Table of Contents
Why This Feature Matters
Publishing blog content helps you enhance SEO, generate leads, and provide essential information to your website visitors. By sharing valuable insights, your blog can become a vital tool for your real estate business.
By consistently publishing blog content, you can tackle common challenges such as low website traffic and poor engagement. Blog posts enable you to showcase local market insights and community highlights, improving your visibility in search engine results. Additionally, a well-maintained blog keeps your website fresh and informative, encouraging repeat visits.
- Navigate to Blog Posts
- Click on Blog in the top navigation bar.
- Then click Blog Posts.

- Create a New Blog Post
- Click the Add New Blog Post button.

- Fill in the required information such as the blog post title, author, category, meta tags.
- Click Save to create the post. You’ll be able to enter the content after saving.
- Click the Add New Blog Post button.
- Add and Edit Blog Content
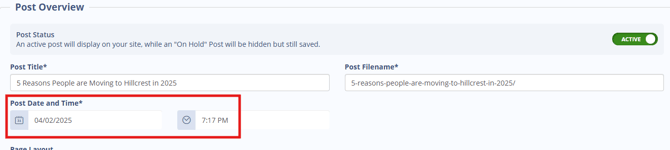
- Once saved, you’ll be redirected to the Post Overview.
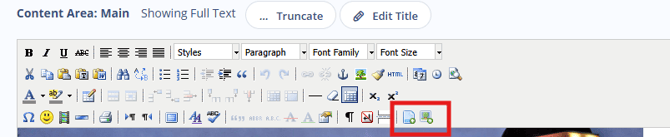
- Enter the body content of your blog post and upload images if needed.
- The Blog Photo section is only for the icon of the blog internally. To ensure you're adding photos to the blog, make sure to use the image icon in the main content area.
- The Blog Photo section is only for the icon of the blog internally. To ensure you're adding photos to the blog, make sure to use the image icon in the main content area.
- Use the formatting tools to style the content.
- Add page components if needed.
- Set Post Status
- Navigate back to the top to select your Post Status.
- You can publish the post immediately by setting the Post Status to Published.
- To delay publishing, toggle the Post Status to On Hold, and select your desired publish date and time.

- Save and Publish
- Review all details, then click Save to confirm.
- Your post will publish based on the status and schedule selected.
- Use SEO-friendly titles and tags for better visibility, such as "Top Neighborhoods to Live in [Your City]."
- Include high-quality images and internal links to other site pages to enhance user experience.
- Schedule posts in advance to maintain a consistent publishing schedule and keep your audience engaged.
👉To learn how to choose the right topics, optimize your writing for SEO, and promote your blogs to capture more leads, see Blogging Best Practices: Attract Visitors and Capture Leads.
-
Issue: I can’t edit content immediately after creating a post
Solution: Click Save first, as this unlocks the content editor and full post settings. -
Issue: Post didn’t publish at the scheduled time
Solution: Double-check that the status is set to On Hold and a valid future date/time is selected.
- Can I include images in my blog post?
Yes, once the post is saved, you can add images in the main content area. - What’s the difference between ‘Published’ and ‘On Hold’?
‘Published’ makes the post live immediately; ‘On Hold’ lets you schedule it for a future time. - Why Won't the Default Blog Photo Appear on the Homepage? When you upload a photo with spaces (e.g.,
july 4th parade.jpg), the filename gets converted. For example, it becomesjuly%204th%20parade.jpgin the image URL. Computers don't handle spaces well, which can prevent the image from appearing as expected.- Rename the Image File: Change the filename to eliminate spaces. Use dashes instead. For example, change
july 4th parade.jpgtojuly-4th-parade.jpg. - Re-upload the Image: After renaming the file, re-upload it as the Default Photo for your blog post or homepage.
- Check the Display: Verify that the photo appears correctly on the homepage after the upload.
- Rename the Image File: Change the filename to eliminate spaces. Use dashes instead. For example, change
- Can I edit a blog post after it’s published?
Yes, you can return to the Blog Posts section and edit any post at any time.