
Table of Contents
- Why This Feature Matters
- Step-by-Step Instructions
- Lender Access and Permissions
- Best Practices
- Troubleshooting Common Issues
- FAQs
Why This Feature Matters
Adding lender users to your account allows you to improve communication and streamline lead management by including lenders in your workflows. By properly setting them up, lenders can receive timely lead notifications, access import lead details, and be assigned to specific leads, enhancing the efficiency of processes for both agents and lenders.
💡 To add a lender as a user, you must be a Primary Manager or a Manager-level user.
Step-by-Step Instructions
Step 1: Add Lender Users to Your Account
To utilize the Lender integration, follow these steps to add one or more Lender users to your account:
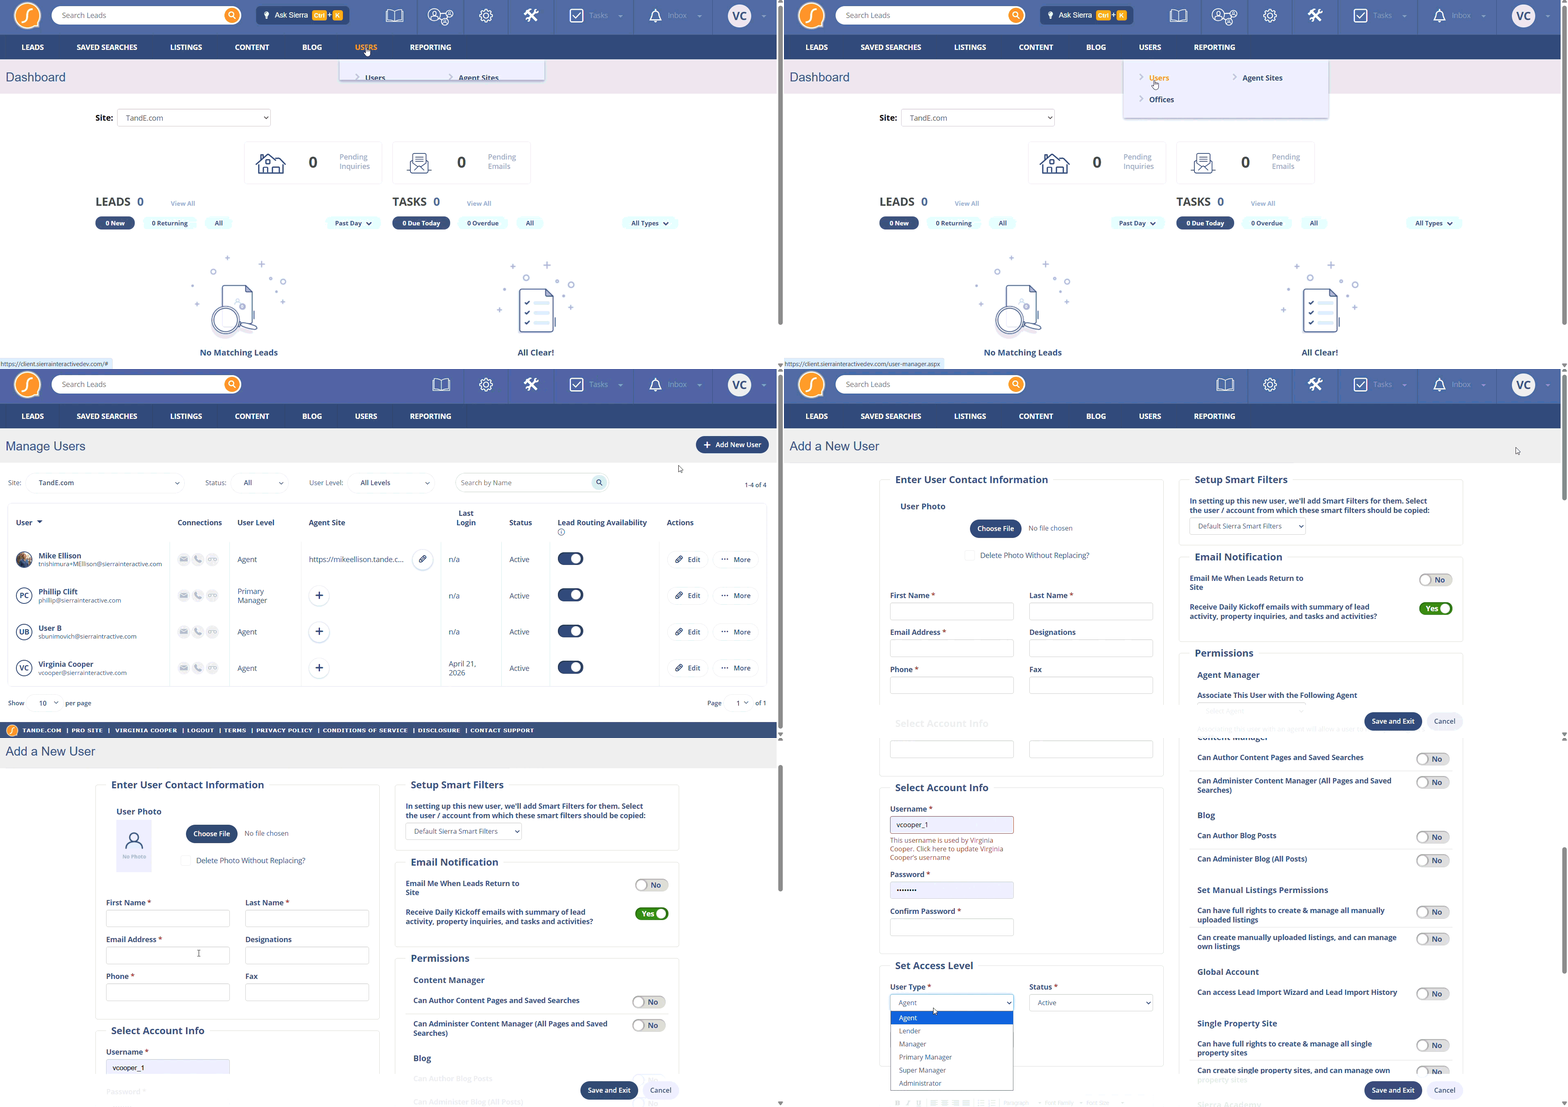
- Navigate to Users tab > select Users.
- Click Add New User.
- On the User form, enter the user details as you normally would, and select Lender as the User Type.

- You can choose whether the Lender (or the account holder) will receive text alerts for new leads or email notifications for returning leads. This works similarly to agent notifications.
A Lender counts as a User. If your account allows up to 10 Users, this Lender will occupy one of those spots.
Once the Lender user is created, they will be able to log in to the admin, configure their email, and connect their phone number like any other user.
Step 2: Configure Sierra Dialer Number for Lenders
Ensure there is a Sierra Dialer Number listed for Lenders in your Voice and Text Settings. This allows Sierra to route return calls and text messages to the appropriate person, even if multiple parties (Buyer’s Agent, Listing Agent, and Lender) are associated with the same lead.
If you haven't set up the Sierra Dialer, check out: Activate and Manage the Sierra Dialer for Your Account (Manager Guide)
Usage of voice minutes or text messages by Lenders will count against the account’s monthly quota.
Step 3: Enable Catch-All Lender Assignment
If you’d like all new leads to be automatically assigned to a Lender, follow these steps: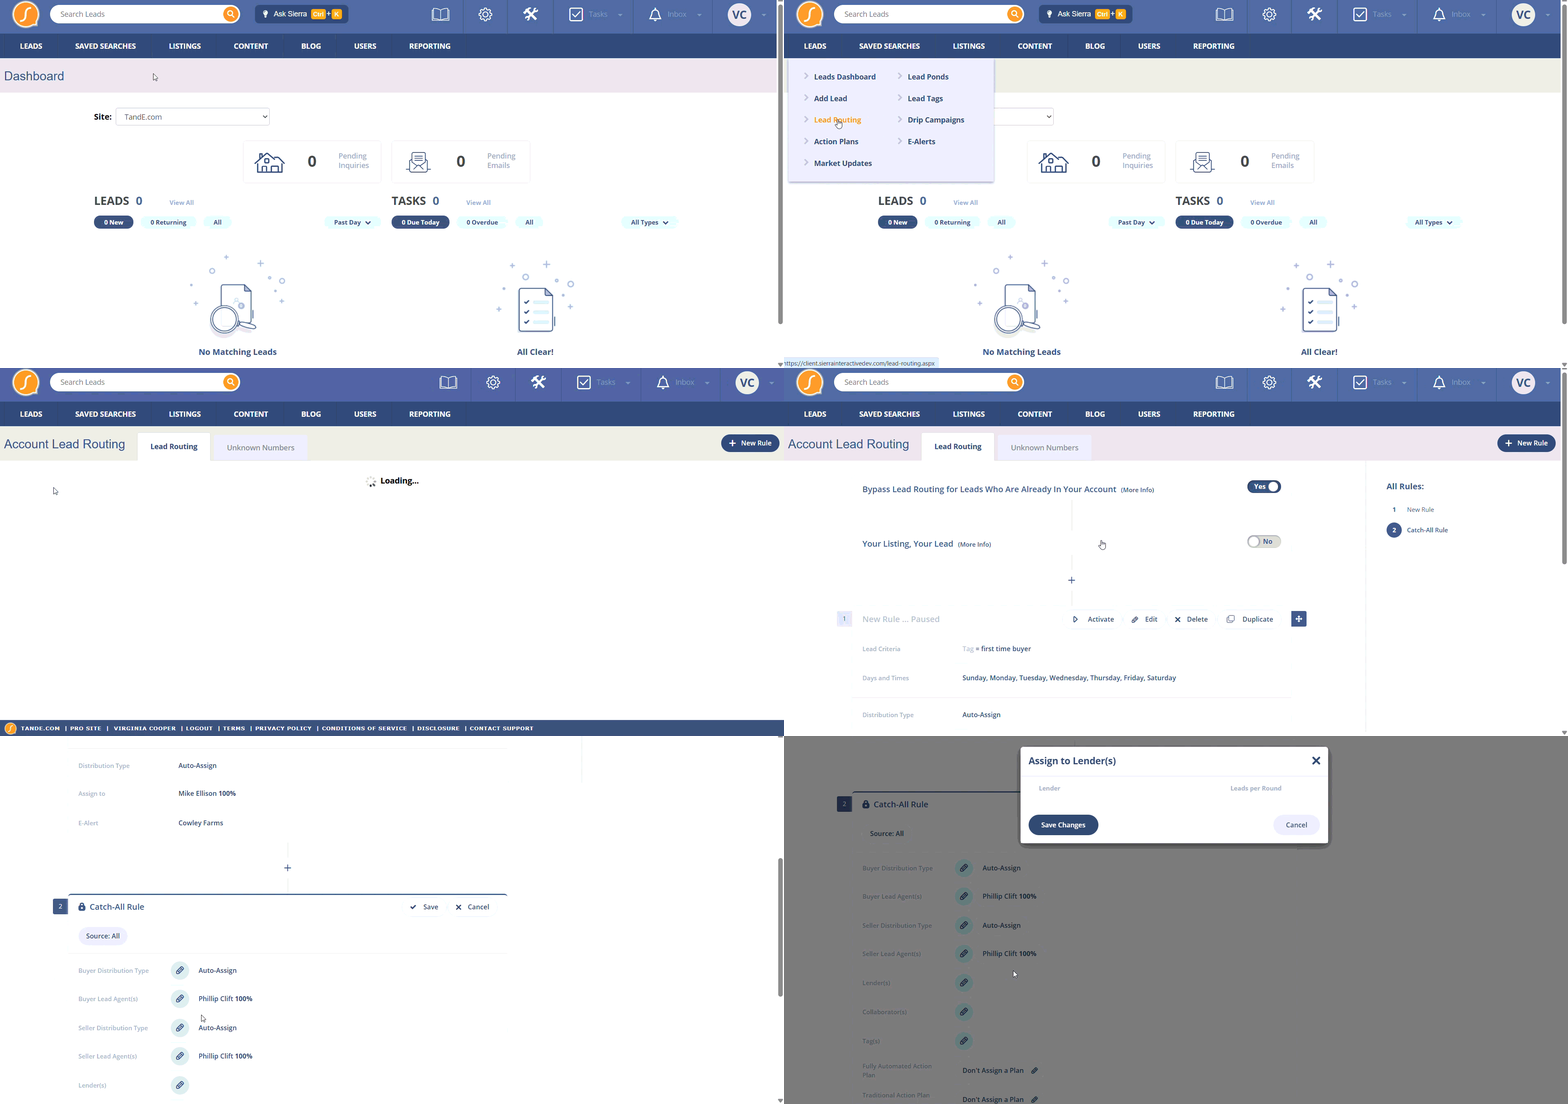
- Navigate to Leads > Lead Routing.
- Each rule allows for automatic Lender assignment. Edit the rule and choose a Lender to assign in specific cases.
- The Catch-All Rule is added by default and cannot be deleted. You can assign a Lender here to ensure all leads are routed to them.
Step 4: Manually Assign Lender to Specific Leads
To assign a Lender to a specific lead, follow these steps: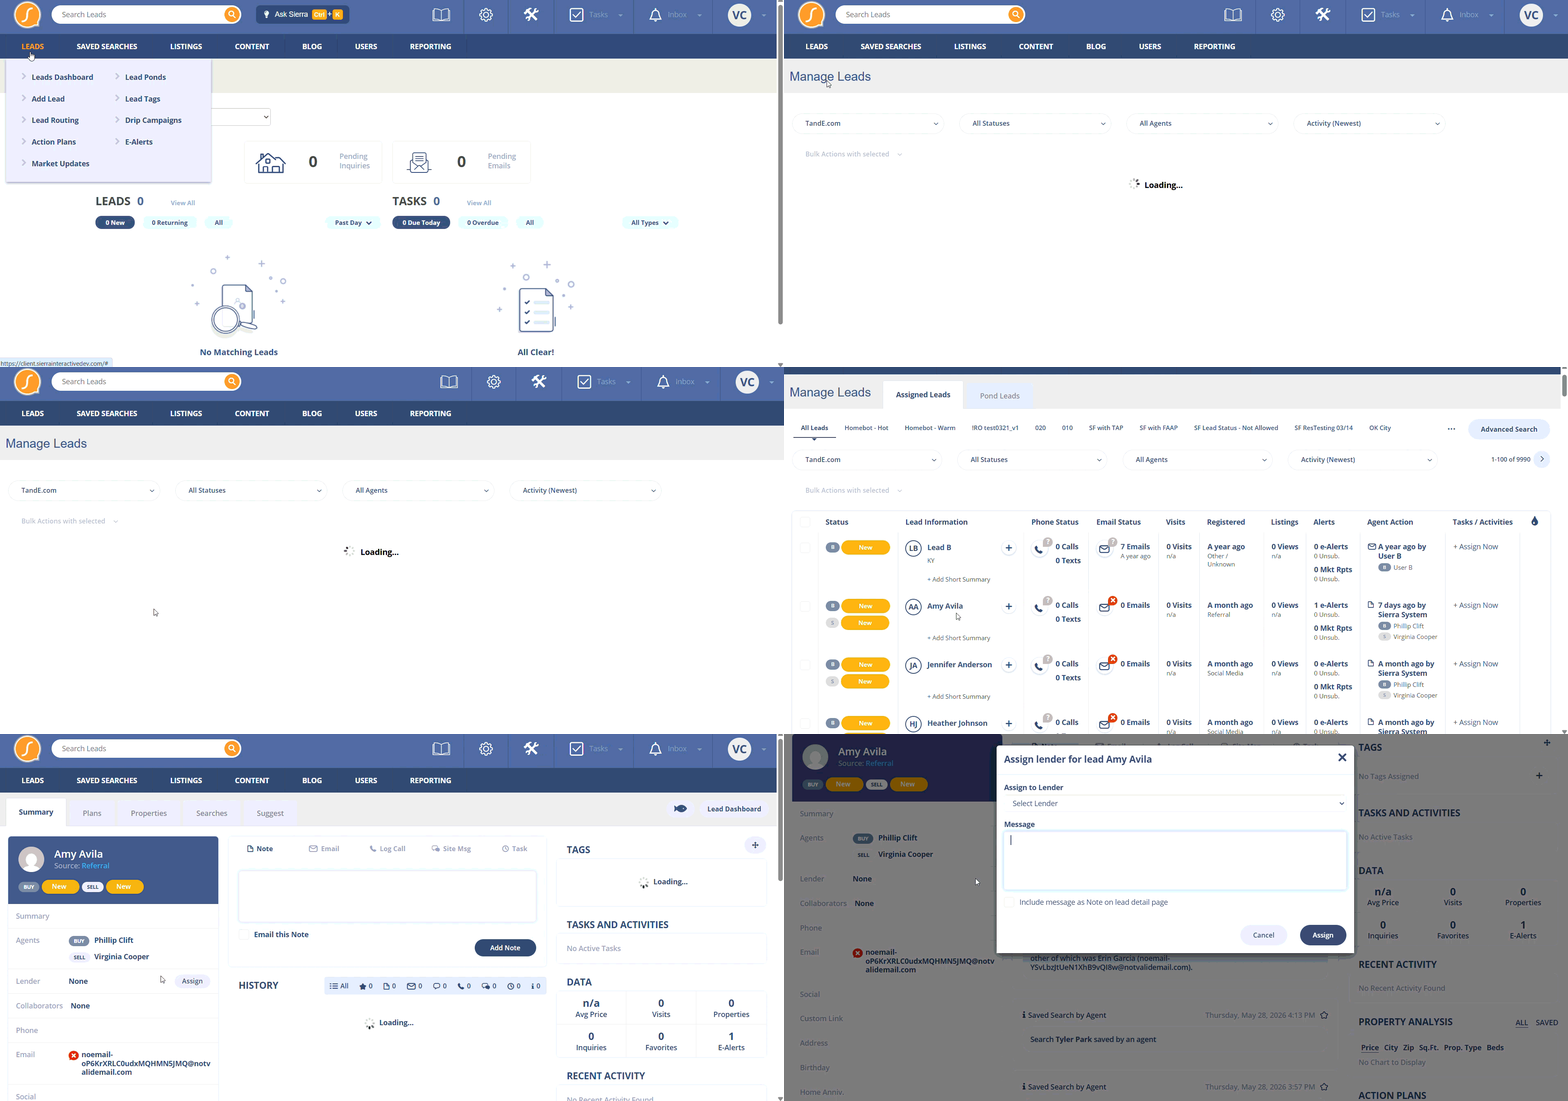
- Navigate to Leads > Leads Dashboard.
- In the Manage Leads page, click on a lead’s name to view the details.
- In the Summary section on the left-hand side, you’ll see a Lender field.
- You can assign or reassign a Lender here.
Lender Access and Permissions
Once a Lender is assigned to a lead, they will have the same access as an agent, allowing them to:
- Add a note
- Send an email
- Log a call
- Send a message
- Add a task
They can also view all lead history on the lead detail page.
Lenders can only view leads assigned to them. They will not have access to leads not directly assigned to them.
Best Practices
- Assign a dedicated Lender to all leads for streamlined communication.
- Ensure Lenders are configured with Sierra Dialer Numbers to manage calls and texts efficiently.
- Regularly review and update Lead Routing rules to ensure leads are being correctly assigned to the right Lender.
Troubleshooting Common Issues
- Lender isn’t receiving text message alerts → Double-check the notification settings during user creation or in the user profile settings.
- The Lender can’t access a specific lead → Ensure the Lender is properly assigned to the lead and review their access permissions.
FAQs
- Can I assign multiple Lenders to a single lead?
No, each lead can only have one Lender assigned at a time. - Can a Lender reassign a lead to another Lender?
No, only Manager-level users have the ability to reassign Lender assignments on leads.