
Table of Contents
- Why This Feature Matters
- Access The Section Manager
- Add New Section
- Change the Order of Sections
- Point a Main Nav Link to Any URL
- Enable and Configure a Submenu
- Understand Top Nav Overflow
- Delete a Section
- Best Practices
- Troubleshooting Common Issues
- FAQs
Why This Feature Matters
A clear, organized site structure helps visitors find the right content faster and move through your website with less friction. Well-managed navigation improves the overall user experience, supports stronger engagement, and helps guide more visitors toward conversion.
Using clear section names like Luxury Homes or First-Time Home Buyers makes it easier for visitors to quickly find the content that matches their interests.
This feature helps you:
-
Customize your site’s navigation and layout
-
Build dropdown menus with internal or external links
-
Maintain a consistent branded experience across your content
-
Organize pages dynamically by section or label
Step-by-Step Instructions
1. Access the Section Manager
-
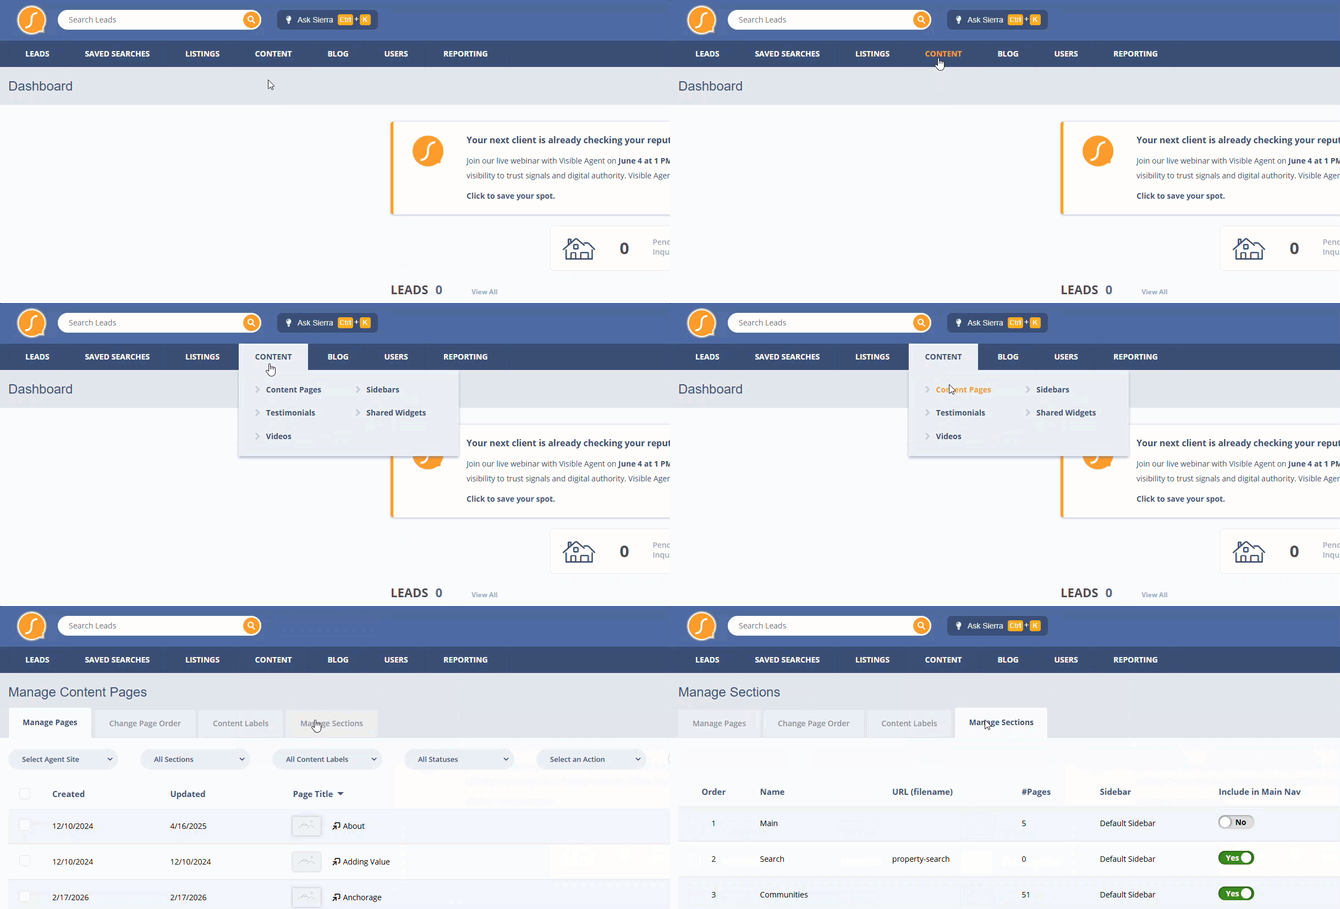
In the Sierra admin, click Content → Content Pages → Manage Sections
-
Only Primary Managers, Manager-level users, and approved Agent-level users have access
2. Add a New Section
-
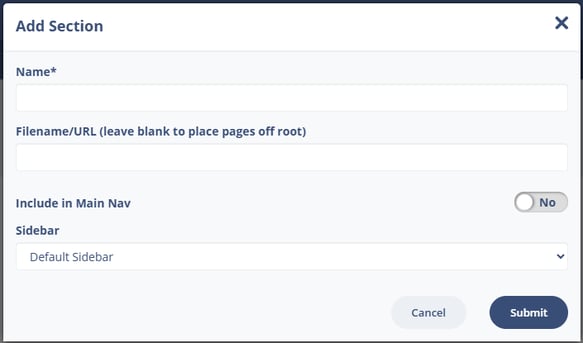
Click + Add New Section
-
Complete these fields:
-
Name (Required)
-
Filename/URL (Optional—determines the URL structure)
-
Include in Main Nav: Yes or No
-
Sidebar: Choose from Default Sidebar or custom option
-
-
Click Submit
3. Change the Order of Sections
-
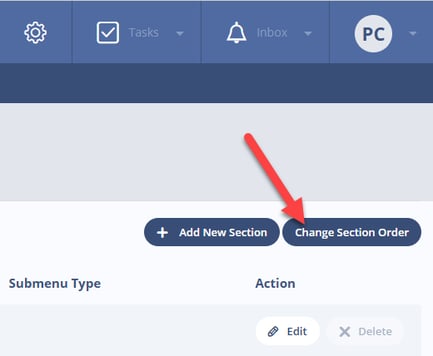
Click Change Section Order
-
Use drag-and-drop or arrows to reposition
-
Changes affect top nav display order
4. Point a Main Nav Link to Any URL
-
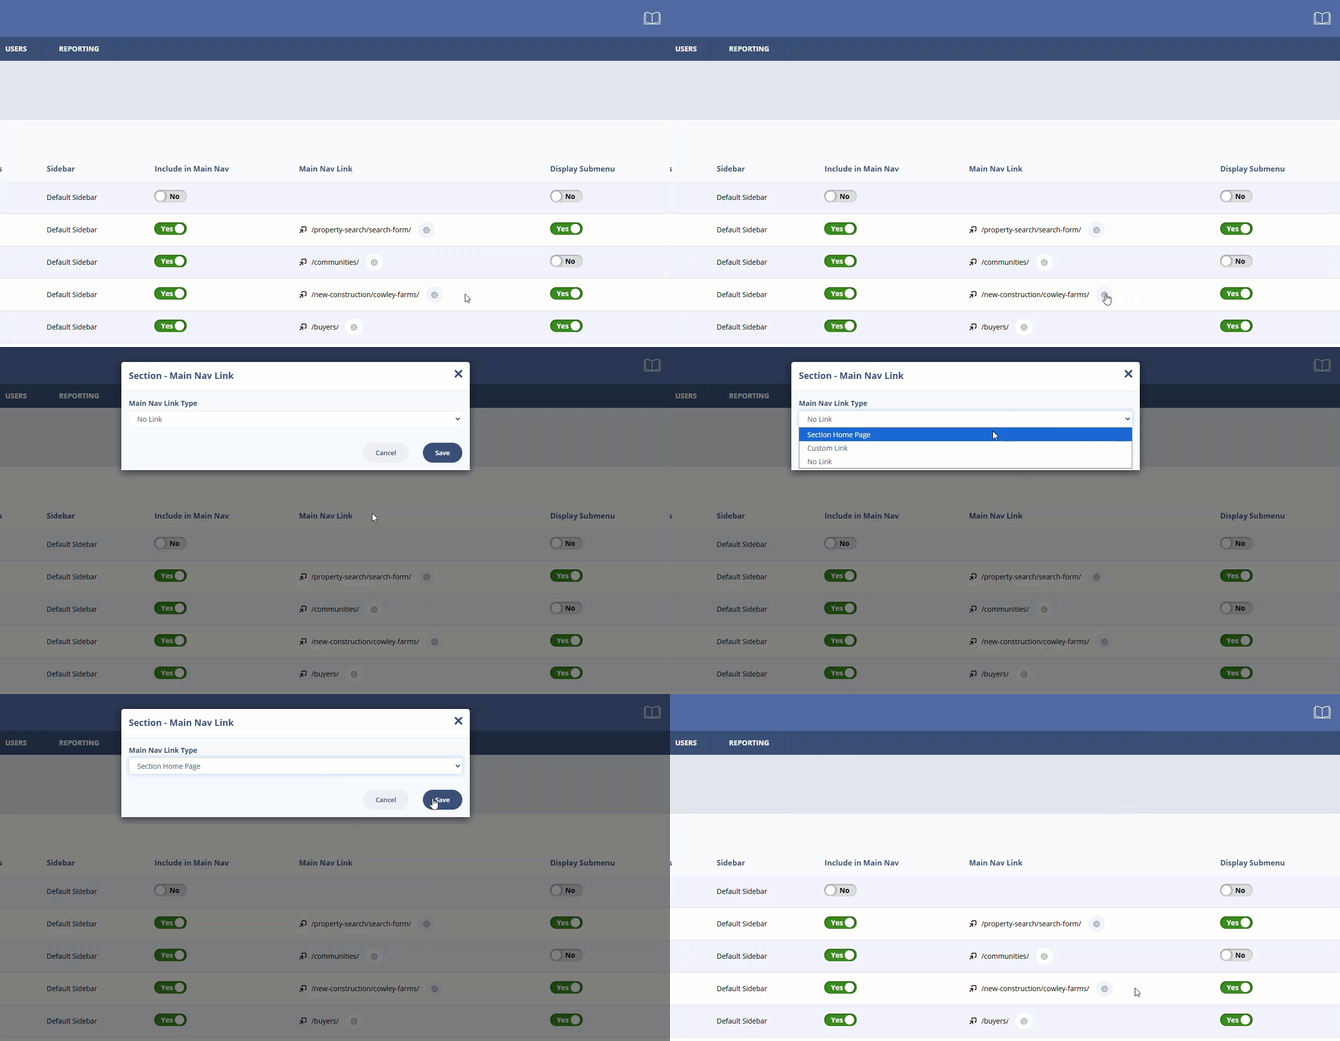
Click the gear icon under “Main Nav Link”
-
Choose to link to the section home page, internal page (relative URL), or third-party site (full URL)
-
Optionally open in a new tab
5. Enable and Configure a Submenu
-
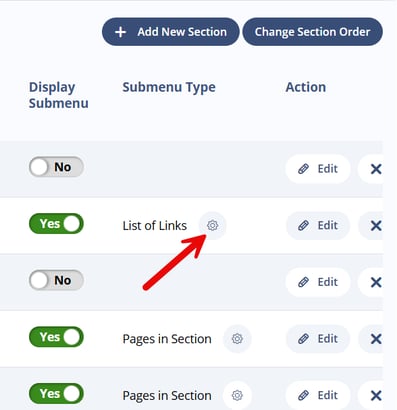
Toggle Display Submenu to “Yes”
-
Click the gear icon under “Submenu Type”
-
Choose one of the following:
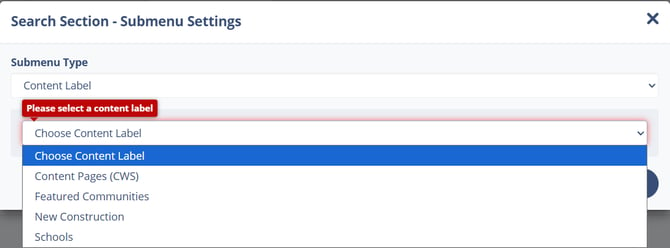
a. Content Label
-
Displays pages tagged with a selected label
-
Content appears alphabetically
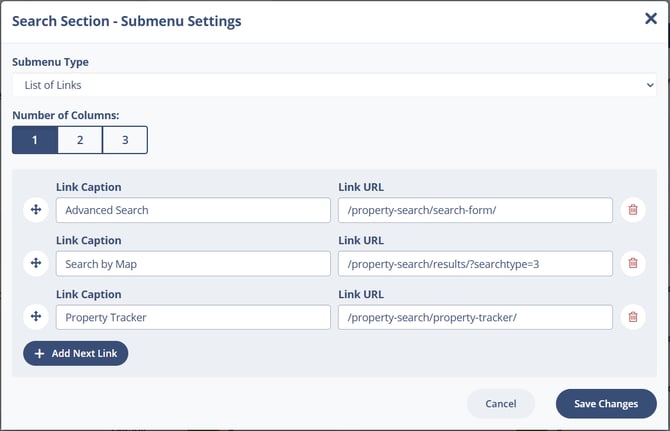
b. List of Links
-
Add custom internal or external links
-
Choose up to 3 columns and name them
-
Use drag-and-drop to reorder or click trash icon to remove
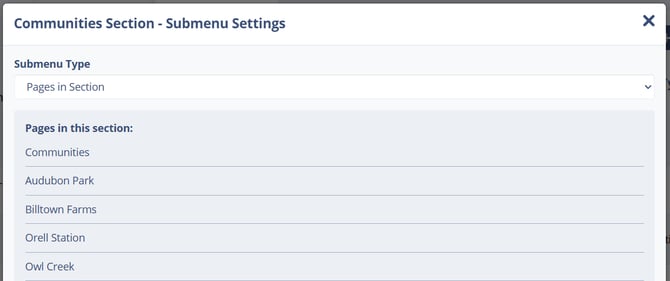
c. Pages in Section
-
Automatically lists all pages from the selected section
-
Use “Change Page Order” to reorder
-
6. Understand Top Nav Overflow
-
If there are too many top nav items, extras appear under a More menu
-
The More menu also displays social links, contact info, and latest blog posts

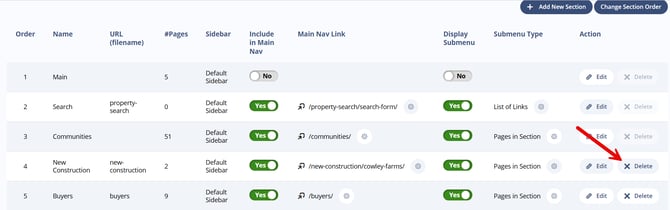
7. Delete a Section
-
Click Delete next to a section
-
You’ll be prompted to reassign its content pages to another section
-
Note: Deleting a section is permanent
Best Practices
-
Use short, descriptive names for sections to keep nav clean
-
Limit top nav items to 6–8 to avoid overflow into the “More” menu
-
Leverage content labels to group pages across sections
-
Double-check all links after editing filenames or URLs
Troubleshooting Common Issues
-
Section not appearing in top nav
Ensure “Include in Main Nav” is set to Yes and the section isn’t in overflow
-
Submenu not showing links
Confirm “Display Submenu” is toggled on and that content/pages are properly assigned
FAQs
-
Can I create dropdowns under any top nav section?
Yes, use the “Display Submenu” toggle and select your preferred submenu type.
-
Can I link a top nav item to a third-party website?
Yes, use the Main Nav Link’s gear icon and enter the full external URL.
-
Can Agent-level users manage sections?
Only if their profile permission “Can Administer Content Manager” is set to Yes.
-
Can I use the Section Manager on agent subdomains?
No. Agent subdomains inherit sections and content from the primary site.