Table of Contents
- Why This Feature Matters
- Step-by-Step Instructions
- Using Drip Campaigns and Assigning to Leads
- Best Practices
- Troubleshooting Common Issues
- FAQs
Why This Feature Matters
Drip email campaigns help you:
- Automate follow-up for new and existing leads.
- Improve email deliverability by sending from your personal address.
- Build consistent communication that converts leads into clients.
The Problem: Many professionals struggle with maintaining consistent communication with leads, which can lead to lost opportunities and underwhelming engagement.
Sierra's Value: By using drip email campaigns, you save time on follow-ups and ensure that your leads receive timely, relevant information that nurtures their interest.
Step-by-Step Instructions
1. Connect Your Email to Sierra
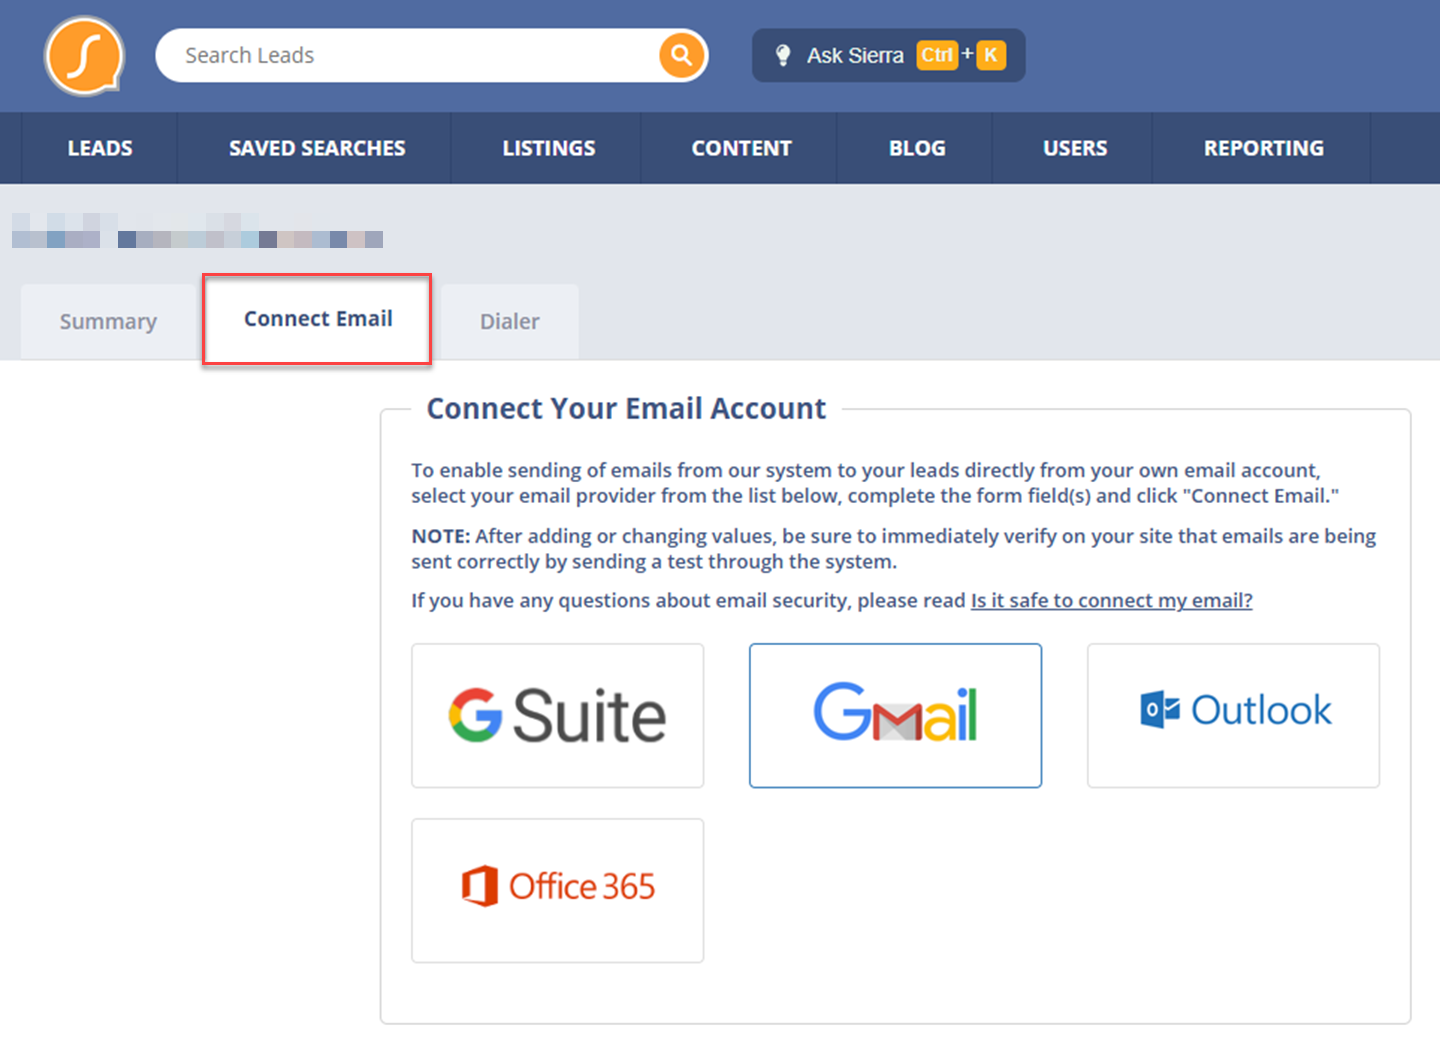
Drip Campaign emails are sent directly from your connected email—not a shared server—which improves deliverability and inbox placement. To connect your email:
- Log in to your Sierra Admin.
- Click your Profile icon in the top right corner and choose Edit Profile.
- Select the Connect Email tab.
- Choose your email provider or select “Other” to configure manually.
- Confirm the connection was successful.
Note: Every user (agent, lender, or manager) must complete this step for Drip Email access.
2. Create a Drip Campaign
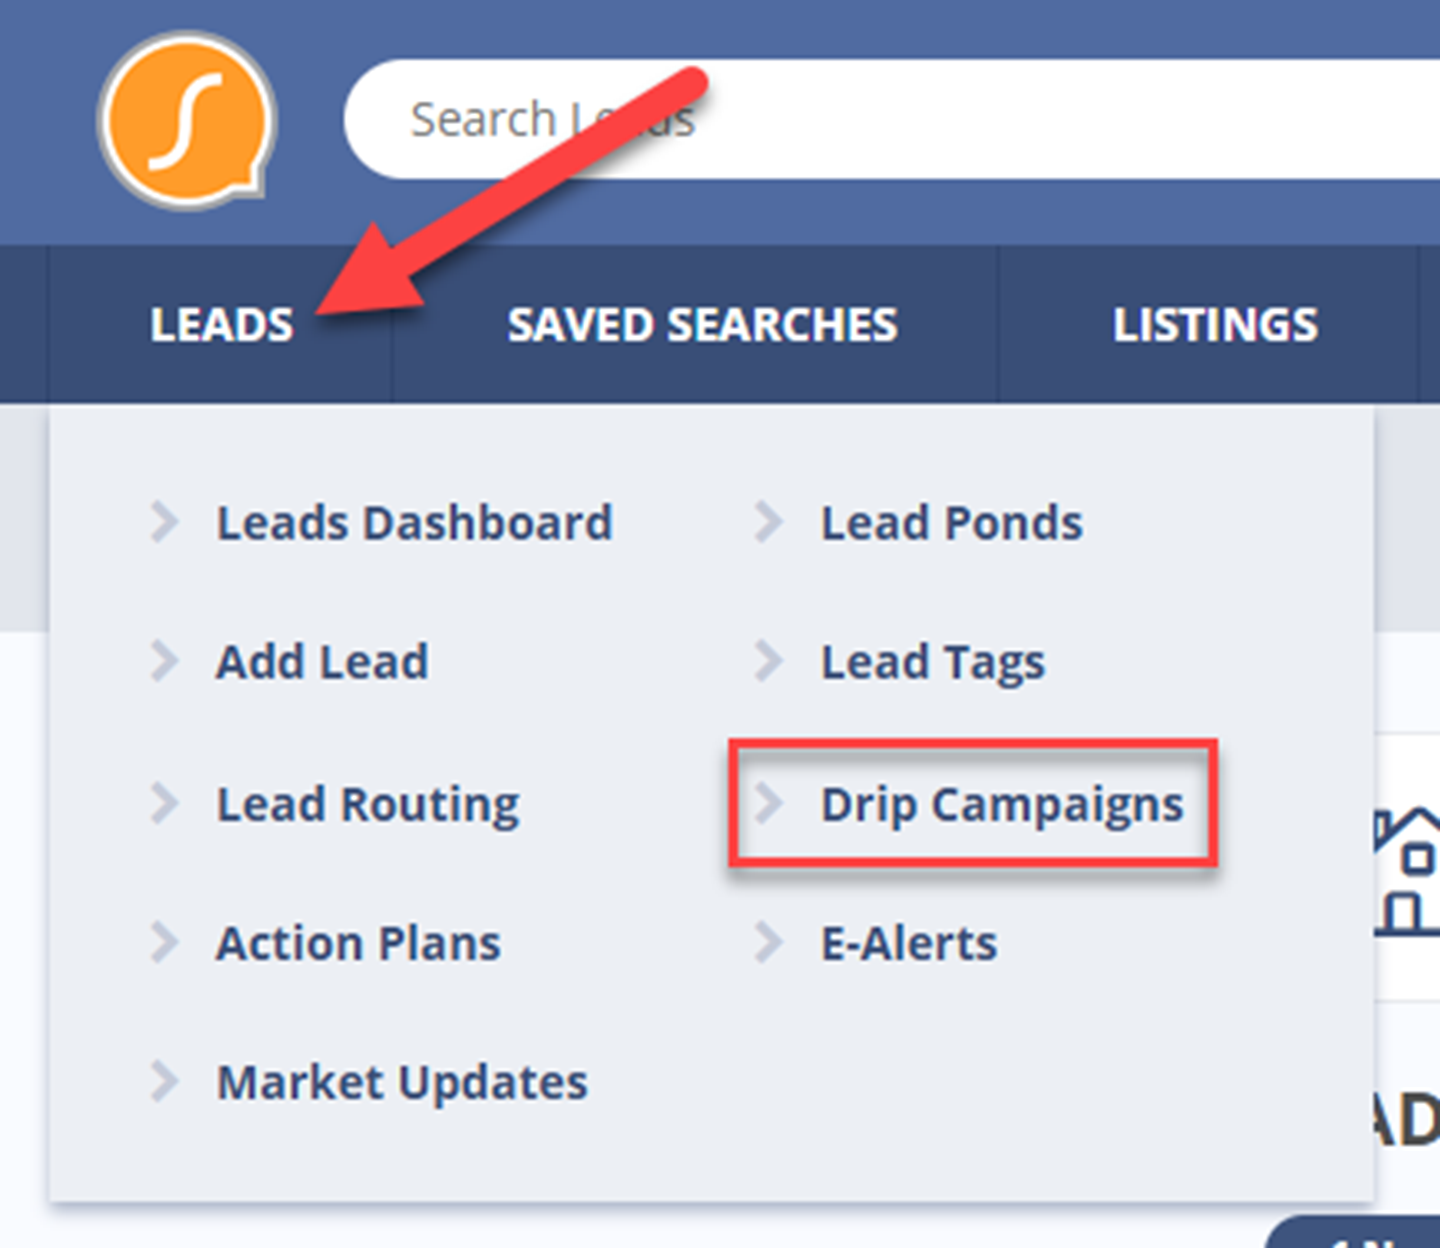
- Go to Leads > Drip Campaigns.
- Click Create New Drip Campaign.
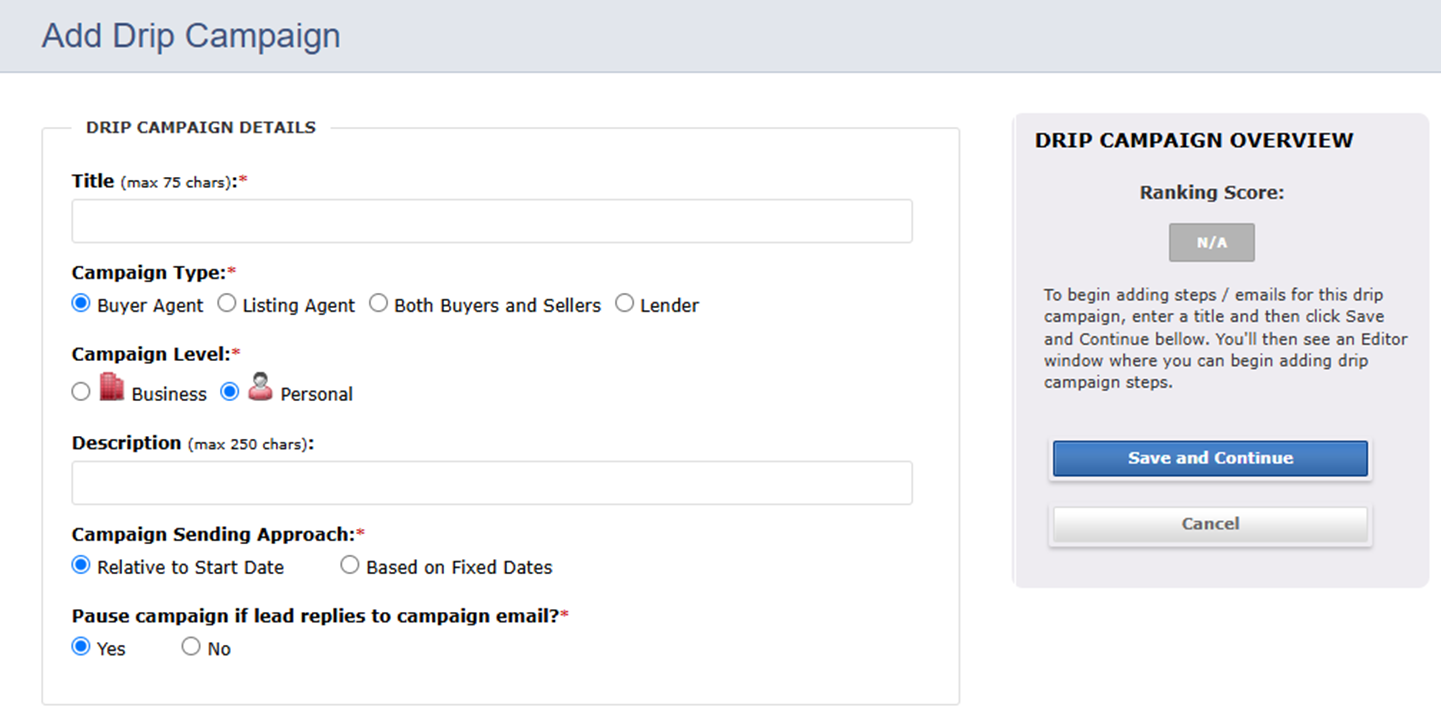
Then configure the following:
- Title: Internal name for team visibility.
- Campaign Type: Choose based on use case.
- Campaign Level:
- Business: Shared with your team.
- Personal: Visible only to you.
Note: You cannot change the level after creation.
-
Description: Optional internal reference.
-
Sending Approach:
- Relative to Start Date (recommended): Starts when a lead is assigned.
- Fixed Dates: Ideal for holidays, anniversaries, etc.
-
Click Save and Continue.
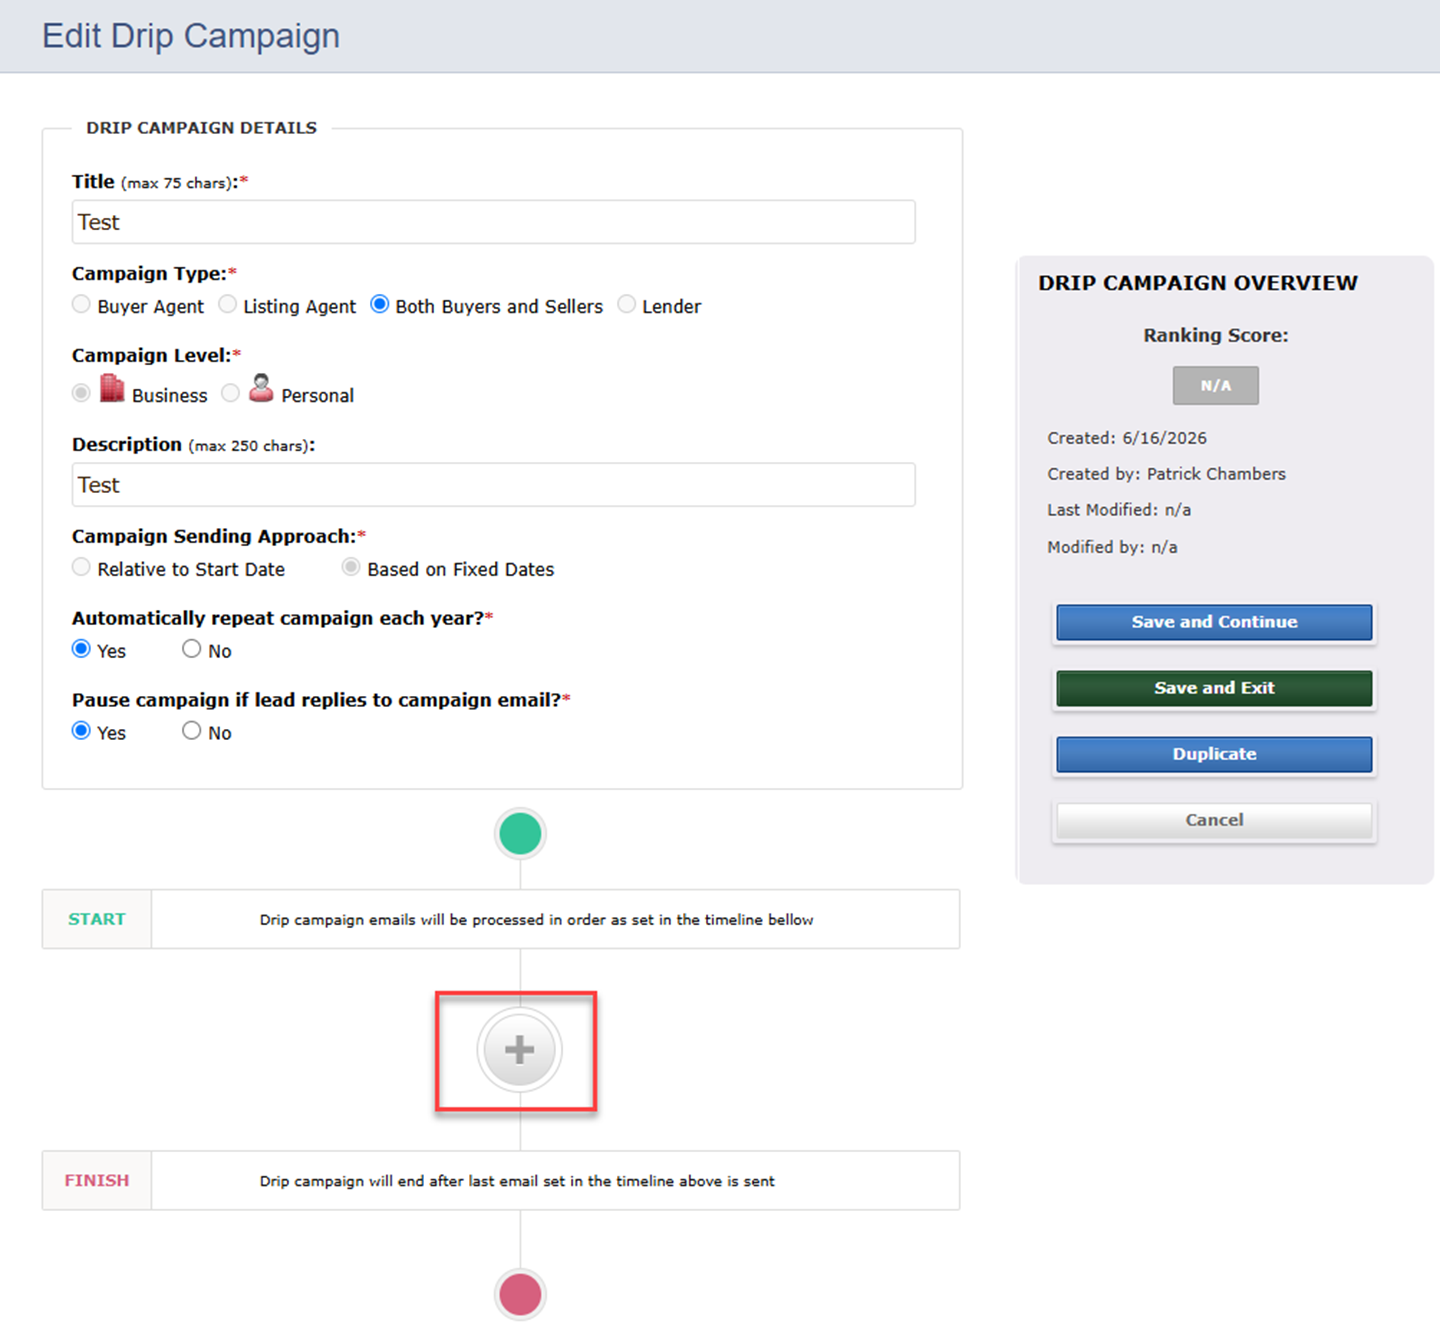
3. Add Emails to Your Campaign
-
Click the plus icon to add your first email.
-
Emails are sent between 7 AM – 11 PM local time.
-
Set a Delay (e.g., 0 hours, 4 hours, 1 day).
-
Choose or create an Email Template:
- Use Global templates (available to all users).
- Or create a new one from within the campaign builder.
Note: Templates must be built in Admin > Contact Templates. Set template access to “Global” and availability for Drip Campaigns.
4. Add More Emails
- Continue clicking the plus icon to build your email series.
- Adjust delays accordingly to space your drips (e.g., Email 2 = 1-day delay).
5. Save Your Campaign
- Click Save and Exit to return to the Drip Campaign manager.
You can:
- Click View to preview all emails in a campaign.
- Print campaigns for review.
- Only users with permission can edit/delete campaigns.
Using Drip Campaigns and Assigning to Leads
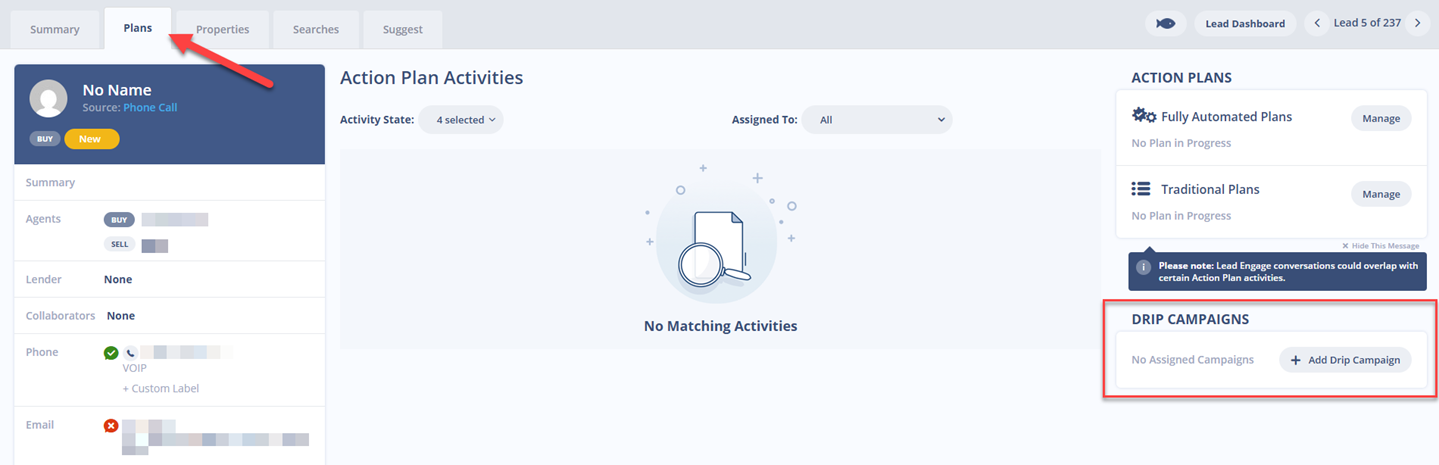
Option 1: Assign One Lead at a Time
- Open the Lead Dashboard.
- Click the lead’s name and select the Plans tab.
- Scroll to the Drip Campaigns section.
- Click Add Campaign and choose from the list.
Note: If you see a “Connect Email” error, refer to the article on connecting your email.
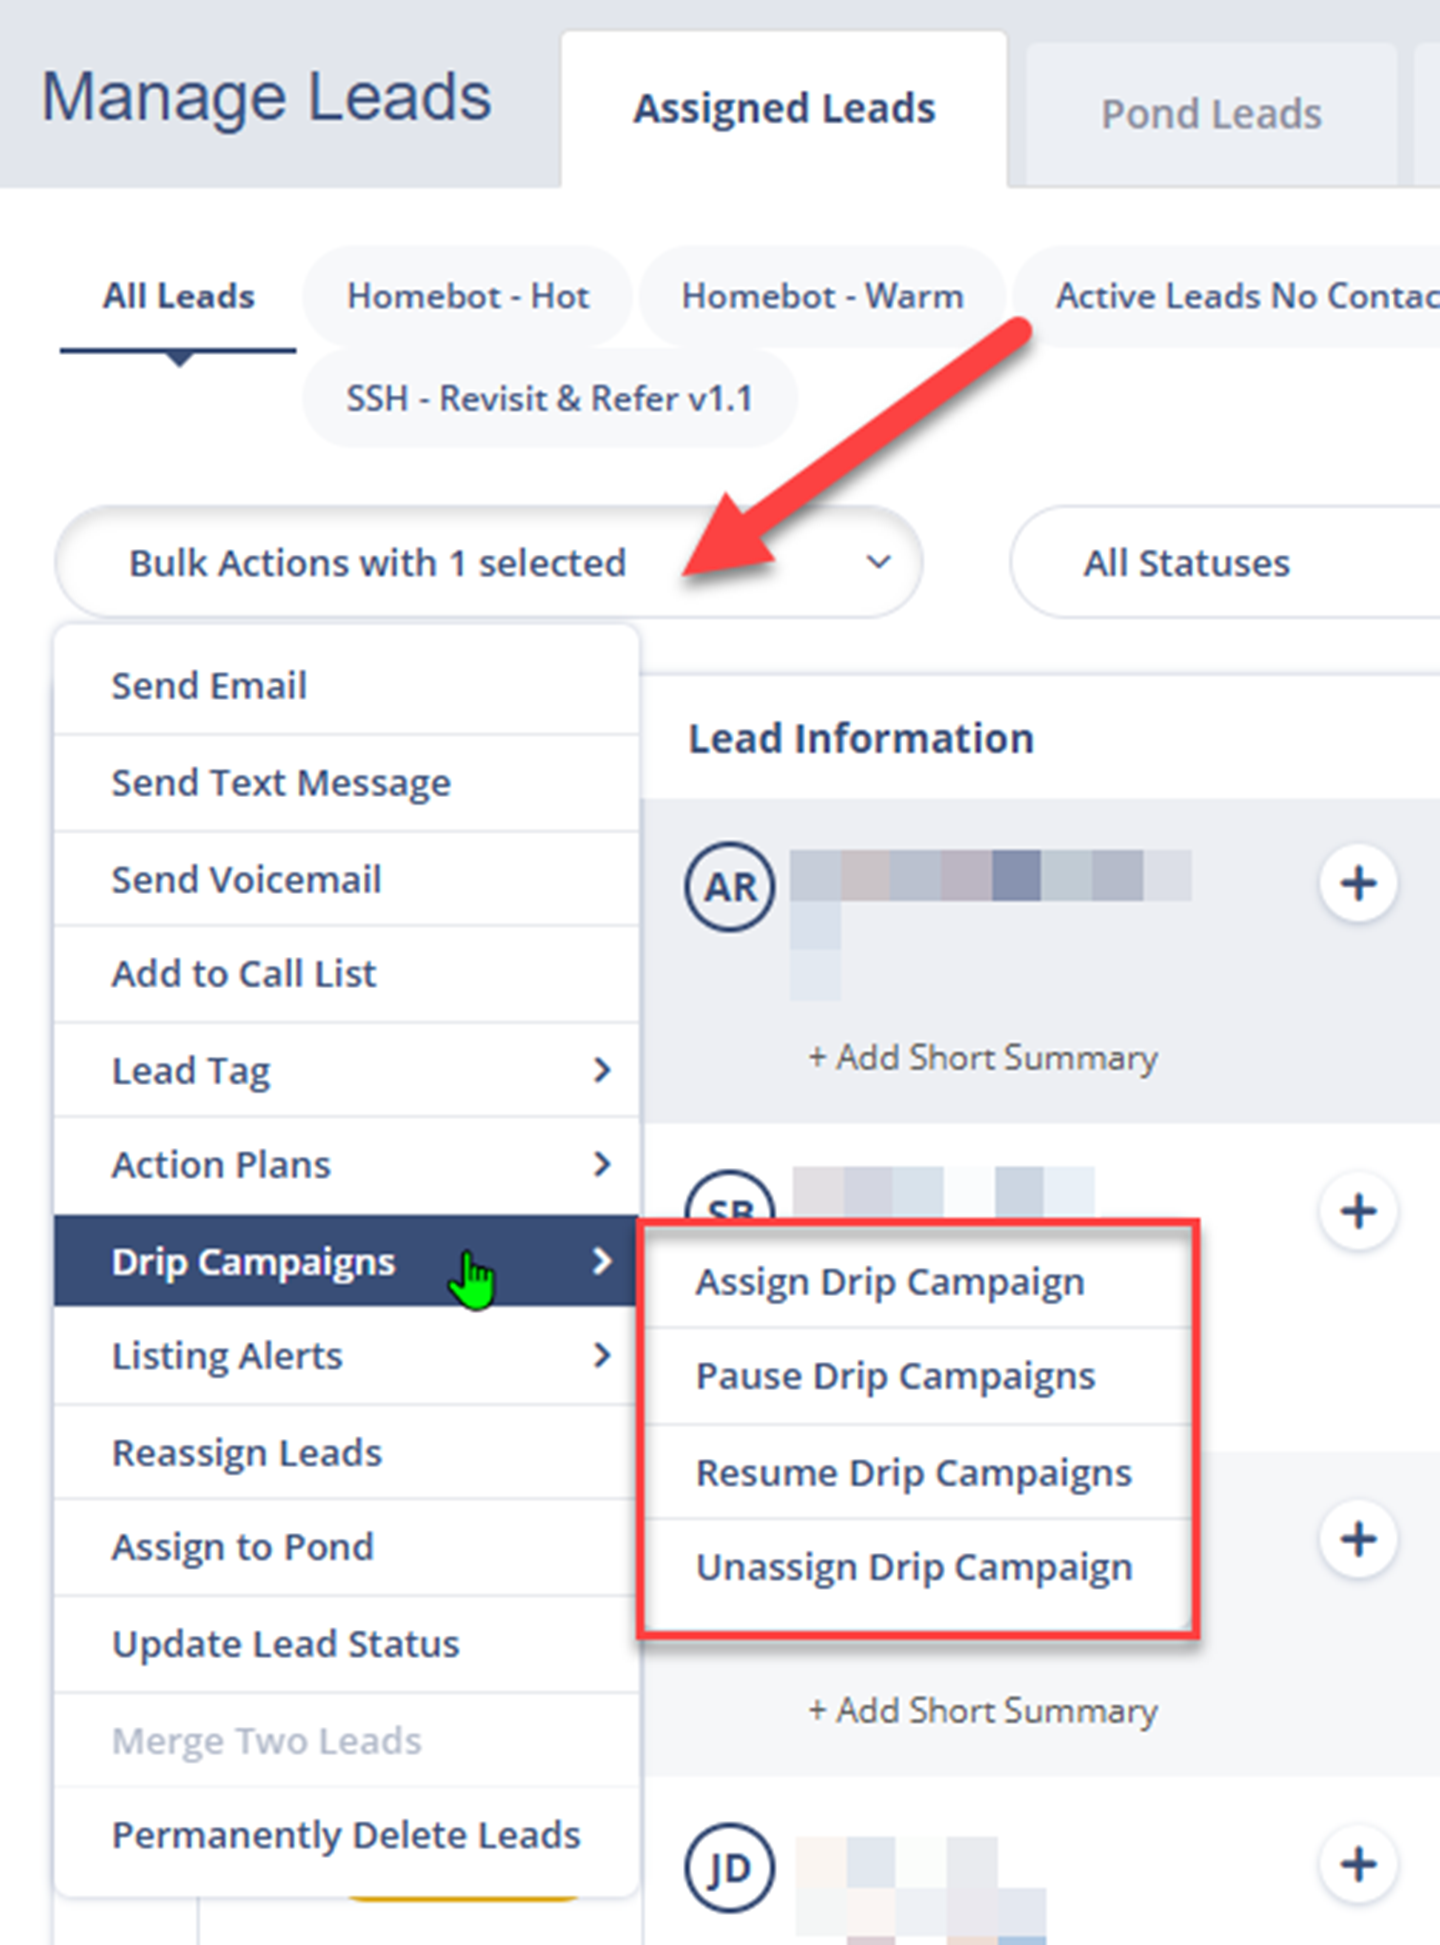
Option 2: Assign Leads in Bulk
- From the Manage Leads page, use checkboxes to select multiple leads.
- Click More > Assign Drip Campaigns to Leads.
- Choose a campaign from the overlay and confirm the assignment.
Best Practices
- Keep subject lines simple and engaging.
- Space out emails based on lead engagement timing.
- Use merge fields for personalization.
- Employ Global Templates for consistent team-wide messaging.
Troubleshooting Common Issues
- Issue: Drip campaign won’t send.
Solution: Ensure your email is properly connected in your profile. - Issue: Can’t see templates in the dropdown.
Solution: Make sure the template is marked as available for Drip Campaigns and has Global access.
FAQs
- Can I assign multiple campaigns to the same lead?
No, each lead can only be on one drip campaign at a time. - Do drip campaigns support text messages?
No. Drip campaigns support email only. Texts are available via Action Plans. - What’s the best way to send holiday or birthday campaigns?
Use the Fixed Date option when creating your campaign.